Showing posts with label Visual Art Activity. Show all posts

Saturday, March 23, 2024

Pumpkin Carving 2023

It's been a while since my last post. Still observing and appreciating art around me, but haven't been able to devote much time to creating art myself since late 2023, with my last works being carved jack-o-lanterns in October. I was inspired by binge watching the Star Wars television series about the Ahsoka Tano the Jedi. She is actually my second pumpkin carving of 2023.


For my first carving of the season I wanted to try out new eyes, specifically peeling concentric circles deeper and deeper from skin to flesh. It kinda turned into an owl, but it was inspired by my own version of Angry Birds.


I then tried emulating a witch face silhouetted against a harvest moon.

Not my best work!


I also did a more traditional jack-o-lantern face with sort of a batwing mouth, skeleton nose, and scary cat eyes. 

You may remember my scary cougar pumpkin, complete with whiskers.

For my final pumpkin, I found three howling wolves on a t-shirt design that as it turns out my nephew owns. While I often use black or red marker to sketch out my design, this time I used a black Sharpie to accentuate the wolves and add another value.


This technique was inspired by my niece who recreated a design found on a Halloween decoration containing a ghost with a black hat. I simply used the marker in a different way.

Tuesday, January 10, 2023

MLK Jr -- Portrait of a Dreamer

MLK Jr. (2017), Glenridge
August of 2023 will mark the 60th anniversary of the 1963 March on Washington for Jobs and Freedom and Martin Luther King Jr's I Have a Dream speech. In February of 2017, a classroom of students from Glenridge Elementary School enlarged a photograph of MLK Jr. and posted it on a bulletin board in one of its hallways. It is a fun way to teach students about value range. My project used a black-and-white poster of Elvis Presley.

MLK Jr. (1962), Karsh

It turns out to be from the famous 1962 portrait by photographer Yousuf Karsh (1908–2002), on display at the National Portrait Gallery, Smithsonian Institution, in Washinton D.C. There is an I Have a Dream (2012) children's book with illustrations by artist Kadir Nelson. My brother has a book by Nelson with paintings of the Negro Leagues, some of which we saw at the Baseball HOF in 2019.

My First Year of Blogging: Teaching Art, Travels, and Observations, from August 2020, also includes MLK. Elvis, JFK, and de Kooning.
JFK (1965), de Kooning

JFK (1960), Rockwell

That same year, President John F. Kennedy was assassinated on November 22nd in Dallas, Texas. I remember it because it was my parents' wedding anniversary and my first-grade teacher cried when the announcement came over the PA system. Five years later, on April 4th, 1968, Martin Luther King Jr. was assassinated in Memphis, Tennessee. Norman Rockwell (1960) and Elaine de Kooning (1965) painted a series of portraits of the 35th President.


The Problem We All Live With (1964), Rockwell


In 1964, Norman Rockwell painted The Problem We All Live With, depicting six-year-old Ruby Bridges being escorted to an all-white elementary school during the New Orleans school desegregation crisis of 1960. Notice the racial slur and the tomato-stained wall.


Aesop's Fables (1970)
Dixie Café, (1948), Lawrence

The Smithsonian is a great place to view historical paintings. Here's one dealing with segregation by Jacob Lawrence. While I enjoy his colorful paintings, his compositional works in black-and-white are particularly striking. I gave a book (right) with such illustrations by Jacob Lawrence to my niece's 3rd-grade teacher.


Stone of Hope (2011), Lei Yixin


In August 2011, the Martin Luther King Jr. Memorial opened to the public in Washington D.C. Chinese sculptor Lei Yixin's inspiration came from a line from MLK's I have a Dream speech -- "Out of the mountain of despair, a stone of hope."


RFK (1972), Leroy Neiman


A month before his death, President Kennedy gave his own version of the I have a Dream speech. It was meant to be a call to action reminiscent of his inaugural address where he said, "...ask what you can do for your country." His brother (and Senator) Robert asked us to "Dream Things That Never Were". RFK's social justice agenda specifically targeted the poor and disadvantaged, while JFK's speech was about his desire for peace in his country, and MLK's speech dreamt of personal freedoms and a world free of discrimination. It's unfortunate that these three dreamers were singled out by fame-seeking assassins.


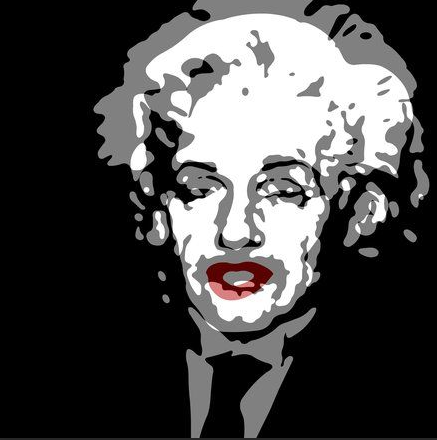
Brains and Beauty (Einstein
and Monroe), Troy Gua
Thomas Alva Edison (1890),
Abraham Archibald Anderson
You don't have to be a religious leader (like MLK Jr.), a politician (like JFK or RFK), an artist (like Jacob or Leroy), a scientist or inventor (like Edison or Einstein), a novelist or songwriter to be a dreamer.


Often, dreams lead to discoveries, breakthroughs, and even Nobel Prize winning contributions to the world. They reflect our personal values, behavior and aspirations to do good in the world.

Pablo Picasso was quoted as saying, "Action is the foundational key to all success."

Vincent Van Gogh may have said, "I dream my painting, and then I paint my dream."

I don't know who said it, but I like this quote: "Every possibility begins with the courage to imagine."

"You see things and you say, 'Why?' but dream things that never were, and I say, 'Why not?'" by George Bernard Shaw.

"Art has the power to transform, to illuminate, to educate, inspire and motivate." So have the courage to dream and share your art with others. Edgar Degas said, "Art is not what you see, but what you make others see."

Monday, October 31, 2022

Pumpkin Carving 2022

My Cheshire Cat (2022), Patterson

More and more I enjoy pealing the skin off a pumpkin to create layers of value for my jack-o-lanterns. The deeper you go, the lighter that area becomes. Completely cutout areas will be bright yellow, while the uncut (skin) areas will have the darkest value. A bonus feature of these shaded pumpkins is that they look good (unlit) in the daylight.

Here's my Cheshire Cat pumpkin. It looks much better with the ears punched through. I also love how leaving the skin around the eyes, nose, and mouth creates an outline, further emphasizing those features.

I carved triangles and diamonds in the lid and on the back side to create chimneys to allow heat to escape. If you carve your lid somewhat symmetrically, then you can rotate the lid to allow for ventilation.


Frankie (2021), Patterson

My favorite pumpkin from last year has to be my Frankenstein head. The lid made for great looking monster hair. By cutting slits in the top edge of the opening the hair was further reflected onto the face, and a larger slit created a gash for a scar. Sometimes the best carvings result from an inspiring pumpkin shape. I didn't need to carve ears, but I did use small scraps and toothpicks to create the electrodes on his non-existing neck.

If you are going to attach ears to your pumpkin, simply cut out an oval shape (or ring) then rotate it and reinsert so that the light can highlight it from both front and back. Notice also how the eyelids are suggested with skin as the outline, while the facial accents are again slits carved all the way through. No shading required!


Every year I search the web for ideas. My Cheshire Cat was inspired by a picture of a pumpkin carving that I found online. The hard drive of my desktop PC before I could get a copy of it on my printer. I also lost MS PowerPoint where I had stored the image. My wife's printer cut off part of the image, so I improvised. I had to figure out how to make the mouth using small triangles on the bottom and larger ones on the top. Everything was carved freehand without using any markers for laying out the lines. For Frankie, I used a photo of a drawing of the monster then made my own inspired design.

Harry (2022), Ken Patterson

I carved a Harry Potter face this year. The example I found has some wonderfully jagged lines and uses peeling for most of the face. The deepest cuts are for his scar (from he who will remain nameless), his eyes, ears, and at his temples. Surprisingly, it only took ~1 hour to complete. I ended up scraping the entire face later but forgot to leave skin for the dark eyebrows. I pushed straightened paperclips through the flesh (from the back) to attach pieces of pumpkin skin above the eyes. Now it looks much more like the young wizard instead of a creepy Chucky doll. It will look even better with glasses made out of wire. The black dots in his eyes are black-headed straight pins. I'm thinking of adding large green sequins for the irises. The entire look is growing on me. It looks better when viewed or photographed from above.


Daytime Harry (2022)


Here's how Harry looks during the daytime and with wire spectacles added. I also added some orange pumpkin sequins (couldn't find green) for irises.


Martha Stewart pumpkin & Mr. Bill

Our pumpkin carving party with the family was a great success. We served pizza and pumpkin pie and take-home caramel apples. We texted photos of our jack-o-lanterns to family members not in attendance and asked them to guess who carved which pumpkin. We also watched the Seahawks beat the NY Giants. Here are two cookie-cutter creations.


Traditional Jack-o-Lanterns


The next two are pretty traditional jack-o-lantern faces. They were carved free hand except for the mouth on the one on the left. He used a cookie cutter shape and repeated it to make the mouth. My sister-in-law got creative and made hair for her pumpkin by carving away the skin and some of the flesh. I like her skeleton nose complete with nostrils.


Symmetric Pumpkin & Chewbacca the Wookie

My sister-in-law's husband decided to carve his second pumpkin by reusing the same cookie cutter for the eyes and mouth. There was lots of hammering going on in order to get the cuts to go most of the way through the flesh. He even inverted the tool to get symmetry in the face. I chose to carve the head of Chewbacca the Wookie from Star Wars, although he could also pass for the Sasquatch.


The Mandalorian (2022), Ken Patterson


We grew two pumpkins this year but didn't carve them. I used another store-bought pumpkin to carve the Mandalorian helmet. It was challenging to carve a black and grey helmet with only little shiny spots on the metal shapes. The deepest cuts were for the eyes and the outside defining the ears and left and right sides of the helmet.


Since my daughter chose not to participate, and her uncle brought a green pumpkin, I carved Grogu ('Baby Yoda') from the Star Wars Disney+ television series The Mandalorian.


Three of the most challenging for me. Mandalorian actually looks best in darkness (below). I love how Baby Yoda looks at twilight (right). Tonight, a 9-yr-old girl told me how much she admired my pumpkins. And she recognized the Wookie! She was definitely a Star Wars fan!!


Here's a photo of my pumpkins all lit up on Halloween night!

Sunday, September 25, 2022

Painting Using MS Paint 3D -- How To

Gaylord, Michigan (2022), Jon Patterson

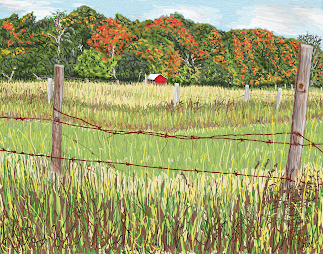
For a while now, I've been posting my brother's artwork that he masterfully accomplishes using Microsoft Paint 3D. It usually requires a tablet and stylus to adequately control the brush strokes using the tools. Unfortunately, the devices available to me are either PCs or Android tablets, so I will need to eventually purchase a MS Surface. Here's the latest painting by my brother. It was inspired by a Fall 2007 photograph my sister-in-law took in the northern part of the lower peninsula of Michigan. It's his third oil brush painting.


He did use the marker tool for very fine lines like the fencing in the background as the oil brush tool's smallest stroke width was too wide. He also used the watercolor brush to blend colors here and there. You'll find that it takes lots of practice to do blending with this tool.


So let's explore the modern world of digital painting! We'll start with a simpler portrait of a cat named Hopper using a photo from South County Cats that we use for PawsWithCause, the non-profit where I volunteer my time in retirement. When we sketch a shelter animal on a canvas for someone else to paint, we typically use Paint 3D to eliminate the background, isolating the animal itself. You may also use Photoshop to accomplish the same thing. This will allow you to lay down any shade you want (using the paint bucket tool) and then add details over it (sort of like underpainting).


My brother used Photoshop to make a transparent background with the cat at 40% opacity, and a second file has the cat at 100% opacity. Sometimes it's easier to color over if the subject is not so bold as 100% opacity. Hopefully at 40% opacity you can still make out the details, but you may also reference the original photo of your subject for the colors, shapes, and shading.


You'll have to overlay color to get a blended effect. But if you use the degree opacity -- which you can set for 7 of the 10 drawing tools -- you can sort of achieve a blended effect. Also, try different shades of a similar color to get the effect you want; i.e., make the overlay color have a hint of the "under" color by sliding along the rainbow color bar. I like the way the shag carpet came out in my background. Don't worry about getting every little detail purr-fect. You are allowed to edit. Since this is my first attempt, I tried nearly every type of brush (even the spray can) available with the tool.


Original Photo of a Painting

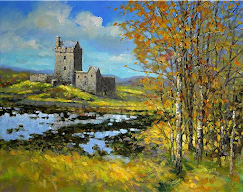
Although I am still limping by with a mouse, I decided to jump right into a more complicated landscape. I chose one with lots of color and appropriately Autumn leaves. It was a photo of a painting that I supplied for inspiration during my recent Acrylic Landscapes class at Franke Tobey Jones' Senior University in Tacoma, WA. I decided to do my painting free-hand from this photo.


Acrylic on Canvas


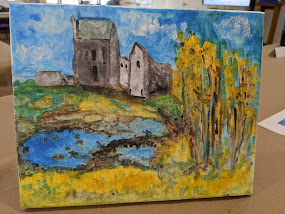
And here's an interpretation done in acrylic on an 8"X10" canvas by one of my students. Note how she chose to make the castle the focus of her painting. She listened to my tips and tricks, used a modified color scheme, edited out the mountain, and created her own composition.


Let's get started with my Paint 3D version and set the size of our canvas. For an 11x14", set the height at 2200 pixels and the width at 2800 pixels. For an 8x10", set the height at 1920 pixels and the width at 2400 pixels. For a square design, it may be ~2500 x 2500 pixels. The higher the pixel number, the higher the resolution (and the bigger the file size). Since you set this in Paint 3D, for a Paint 3D PROJECT (and not an image you are importing), the numbers apply to the whole project (if that makes sense).


The first painting step is to lay down the zones of color in the background, using broad (20-50 pixel setting) brush strokes, to serve as our underpainting. My brother recommended using primarily the oil brush tool for this painting.


Mine is a bit more detailed because I wanted to leave a space for the clouds and castle shape. The trees will eventually show through to the background, so I extended the dark gray shape to the right. It may be important to write down the RGB color codes you choose in the event you want to return to them later (e.g. for the pond reflection). Of course, you can rely on your eyes for choosing colors.


Most of the rest of the painting can be done with the oil brush set for narrower strokes (25 pixels or less). Experiment! Remember you can always hit the “Undo” button if you don’t like it! The “Undo” button can erase a seemingly unlimited number of previous strokes. While I was using a mouse, I noticed that I had to lift it up regularly, so that I didn't Undo large areas. This is especially true when scribbling in the clouds!


I used the marker tool to begin playing with the trees. Since I don't have to wait for paint to dry, I am able to freely move around and add overlapping details. I did some of it with the watercolor brush and even tried the spray can tool on the shadowy grass in the foreground (in later steps).


This picture has lots of colors in it, so I chose multiple shades of yellow, orange, green, etc. And remember, when you’re in “yellow” mode, you can slide that rainbow color bar toward orange if you want it more orange, or toward green if you want it more green. This is pretty much the final state of this painting. I like how my colors are brighter than the original. I probably could have made the grassy area in the foreground more vivid, but I was mainly playing with the tools.


Here's the final painting. Notice how the sky has been softened using a combination of watercolor strokes and the spray can tool. The horizon line has also been blended. I added in grass using the marker tool to give a bit more detail to the foreground. For my next challenge, I may try painting a dog.


Here's a kitschy painting of my 1-yr-old Shih Tzu masquerading as a Star Wars Wookie, Chewbacca. I call it Chewbailey.


Here she is dressed as an organ grinder's monkey. Her paws are raised above her head as if she's putting on the fez.


After hiking the Cedar Butte Trail in North Bend, I was inspired to capture the view from the top using my PC mouse in Paint 3D. Similar to the above landscape, I laid down bands of color for the sky using the oil brush. Then I worked on the purple mountain and the lower valley. After softening/blending the sky, I used the watercolor brush and spray can to create a sort of haze. I finished by drawing in the trees using a combination of the marker and other tools.


Friday, May 27, 2022

Sketching and Drawing

White Cup and Saucer (1864), Henri Fantin-Latour
Everything is so instant nowadays. Instant photos, instant messages, instant coffee (not!). Remember when you did long division, or used a slide rule, before everything was made easier with a calculator? Or snapping a picture with a camera and waiting to develop the photos? How about whipping out a sketch pad and making your own impression of your surroundings? Today, we rely on a cellphone to readily capture what we see by clicking a button, never thinking of picking up a pencil and paper.

Portrait of Isabella d'Este
(1499-1500), Leonardo da Vinci


Sketching and drawing are lost arts. Yet, they are perfect examples of ways to settle your mind, reduce stress, and spend time observing the world around you. Artists use sketching to plan out their final paintings and to establish the value range of light to dark. They often focus on particular details, using them as components for later compositions. This approach helps cement the images in your mind for later retrieval. Da Vinci sketched this woman, using her costume and hand gestures later in his portrait of the Mona Lisa. Even musicians practice in jam sessions before cutting the final track.


You also need to sit down and focus your attention on a particular subject or scene, like these kangaroos from a zoo or wildlife setting. Begin with rough sketches and numerous studies. Take notes and some reference photographs or simply rely upon your own memories. Sometimes, just capturing various shapes of trees, shadows, and using shading to capture the direction of your light source is all you need. The arrangement of shapes composes an image. Having a black-and-white drawing allows you to experiment with the colors later, relying on your emotions and memories to depict a mood.


Van Gogh Sketches

In high school, a classmate and I would bring our sketchpads to sporting events and draw basketball players in action. My brother would sketch portraits of local professional baseball players. I remember going to a car dealership where some of the NY Yankees were doing a promotion, and my brother got Whitey Ford to sign his portrait. Vincent Van Gogh often included sketches in his letters to his brother, Theo.


Drawing of Jeju

Photo of Jeju

Photographs capture lighting and atmospheric conditions that may undergo change while trying to paint a scene outdoors (en plein air). Sketching, on the other hand, is interactive and very fluid, allowing you to experience the subject and etch it into your memory.


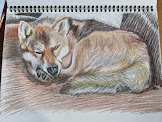
My Sketch / Painting

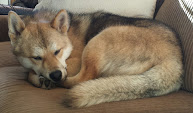
Photograph at Lake Sawyer

While sketching requires looking at a subject, it can also be completely made up from your mind. It helps to obtain an understanding of anatomy and proportion when sketching animals or human figures. Learning to rely upon quick lines and the ability to edit out unnecessary details simply takes practice. Start by working on the body of a subject, then fill in the background later. A finished drawing or painting will take much more time and practice to complete.


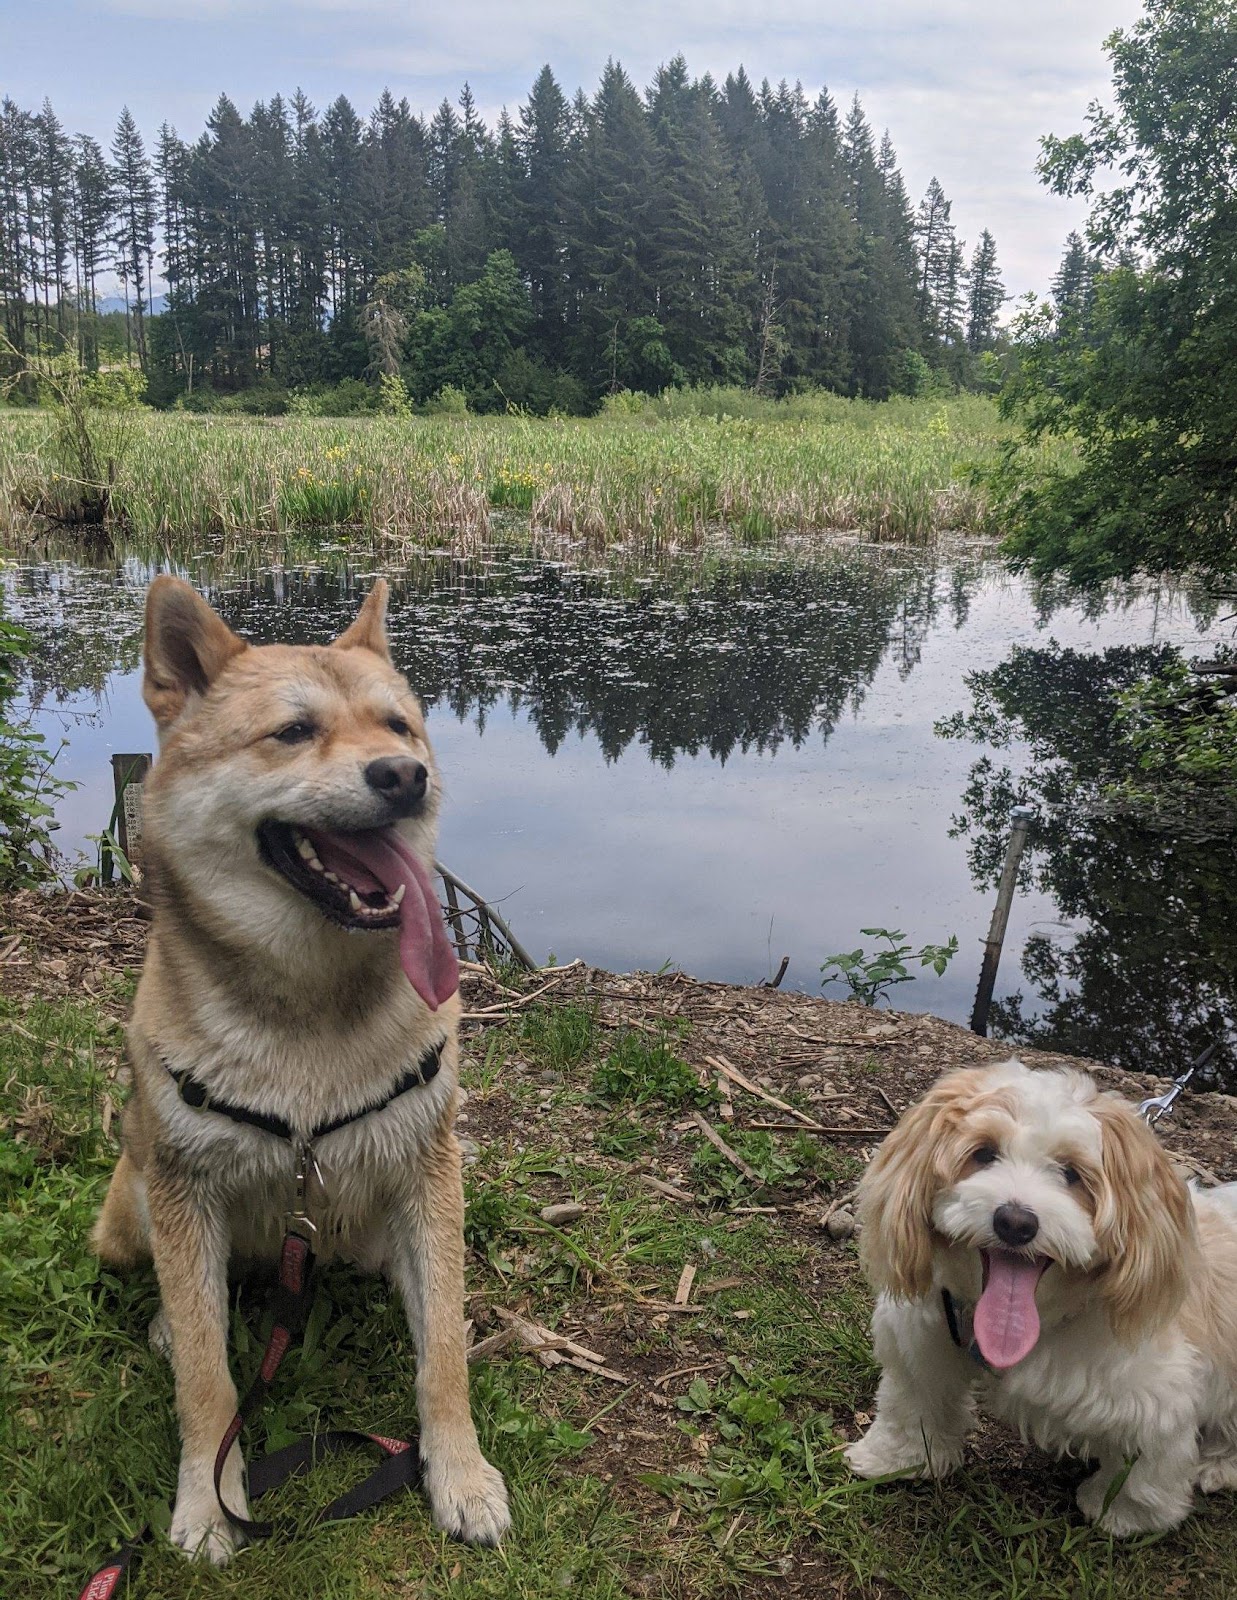
Final Painting of Dogs at Lake Sawyer

The paper you choose for drawing will usually be of higher quality than what you use for sketching. You can find sketch pads in a variety of sizes, textures, and finishes. Drawing paper is typically thicker and denser with rougher texture for grabbing graphite pencil, ink, charcoal, pastel, or other artistic medium. On watercolor paper, I suggest using a light colored pencil, while on a gessoed canvas surface I would use graphite pencil or charcoal. Such sketching is used more as a guide to laying out a painting, although my subjects (above) needed to be much more detailed.